

The Roadster V3 model originally came with a rigid stem that did not allow for the adjustment of the handlebar position. Luckily there is now an option to replace the rigid stem with a adjustable version that will allow you to better adjust the fit of your bike. This video and article will show the steps required to replace the Roadster V3 rigid stem with the adjustable version.
Step 1: Remove the stem faceplate and handlebars
The stem faceplate, handlebars, and headlight will first need to be removed from the stem. This can be done by removing all 4 bolts on the front side of the stem and disconnecting the headlight from the underside of the stem. The handlebars can be left dangling by the brake hoses for the next few steps.
Remove the handlebars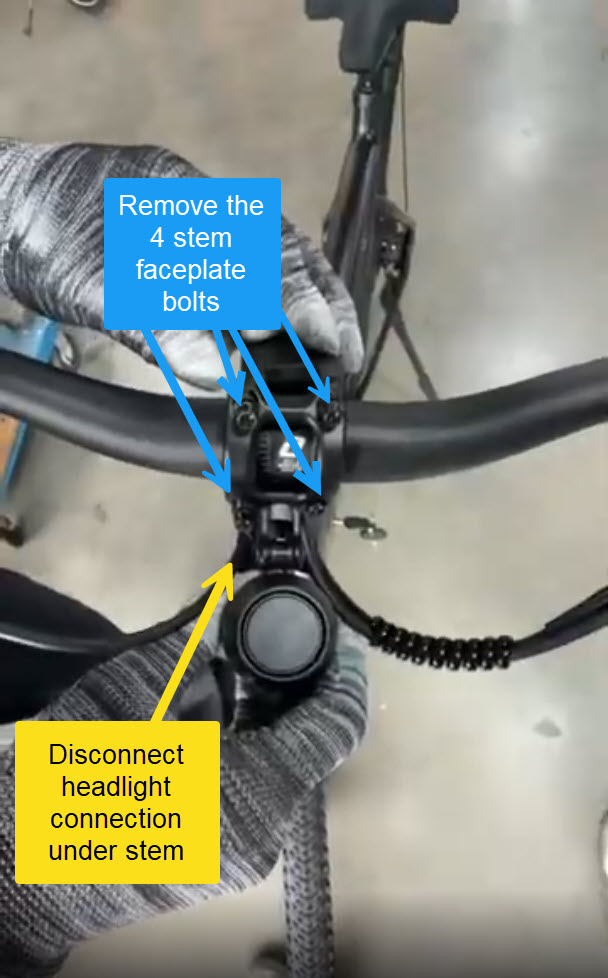
Step 2: Remove the rigid stem
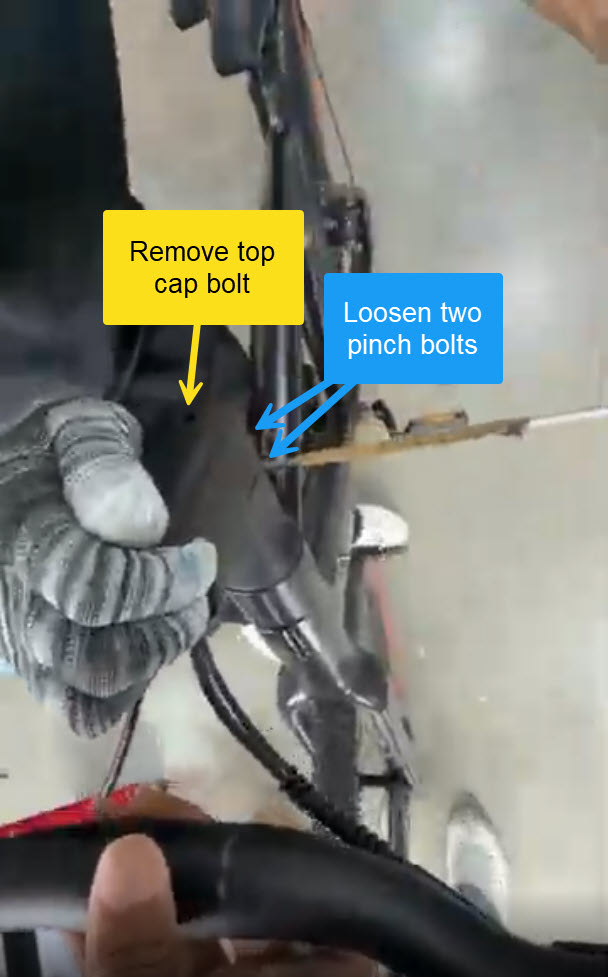
With the handlebars off, the stem can now be removed from the bike. There are a few bolts that will need to be dealt with before the stem can be pulled off the bike:
- Two pinch bolts on the side of the stem need to be loosened
- The top cap bolt on the top of the stem needs to be removed
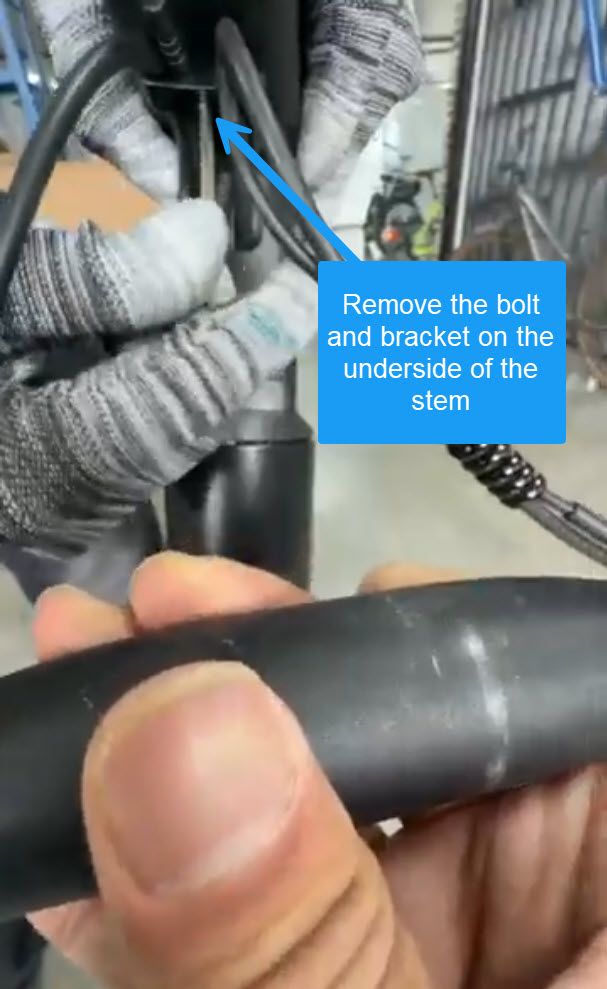
- The bracket holding the wires under the stem needs to be removed
With these bolts loosened or removed the stem will simply lift off the silver steerer tube below.
Loosen/remove the stem bolts
Remove the wire bracket
Step 3: Remove the first stem spacer
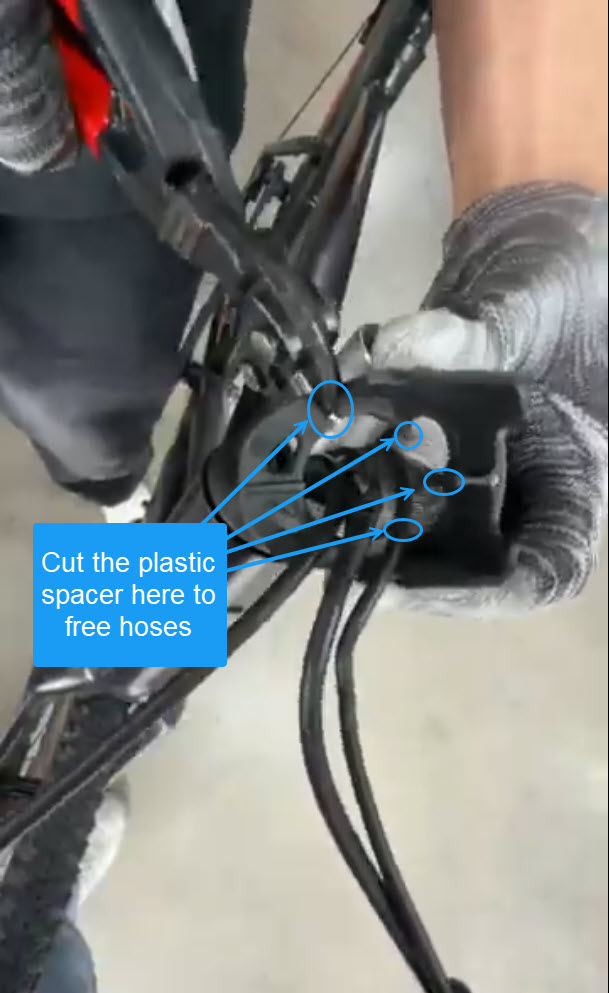
The first plastic stem spacer below the rigid stem will need to be removed and the hydraulic brake hoses run through this part. The easiest way to remove this part is to cut it off the hoses with hand snips. Be very careful when cutting to be sure to only cut the plastic and do not cut the hose or wires. The rest of the spacers can be used with the new adjustable stem.
Cut the stem spacer for removal
An alternative and less destructive option to remove this part is to unscrew the hose from the brake levers before threading them through the spacer. This is a good option if you intend to reuse the rigid stem in the future but it does require a brake bleed after the adjustable stem is installed. For more information on the brake bleeding process see this article: Hydraulic Brake Bleeds: How to Fix Squishy or Spongy Brakes
Step 4: Install the adjustable stem
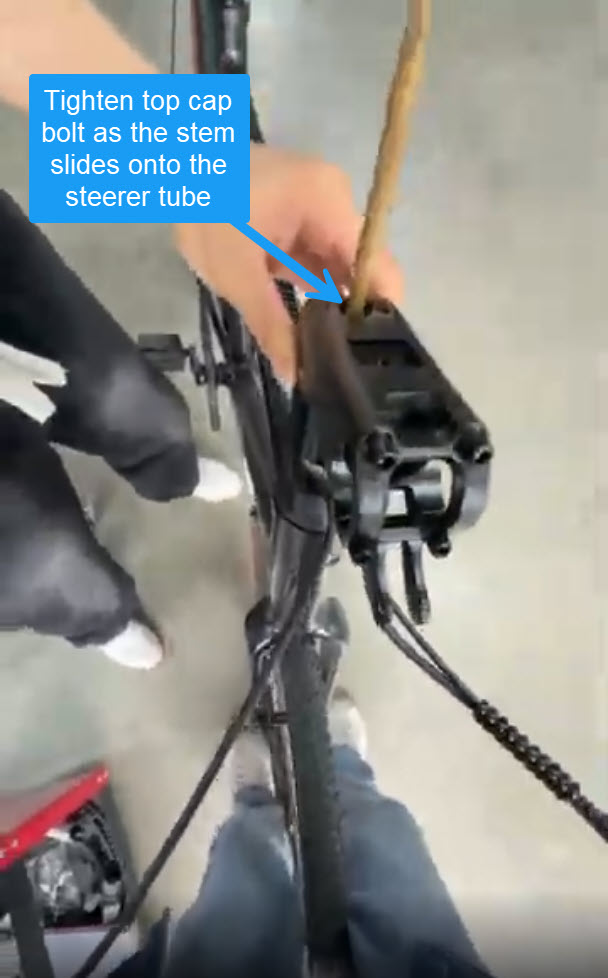
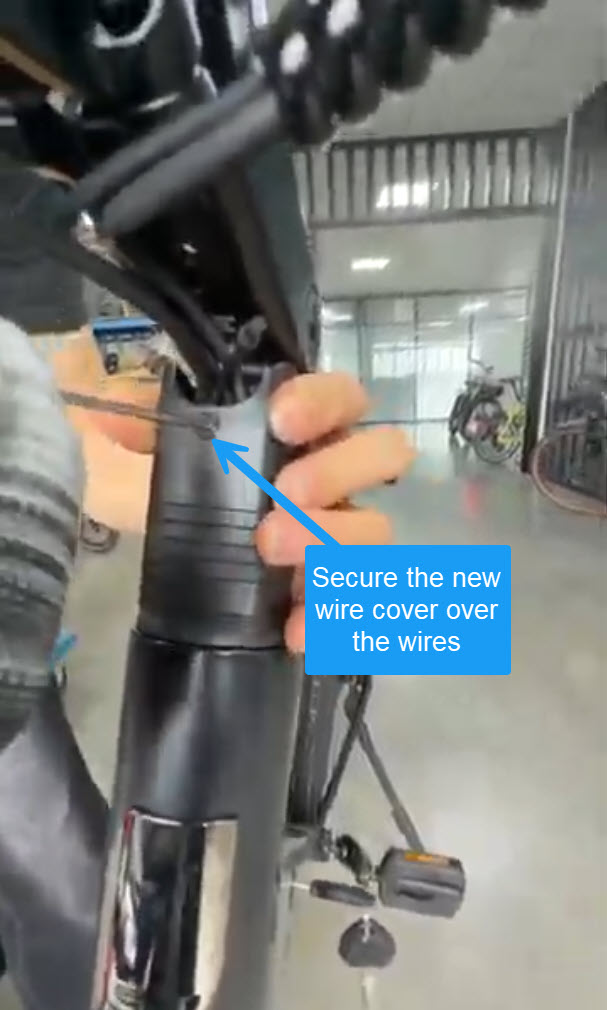
The new adjustable stem can now be installed over the fork steerer tube. The top cap bolt on the top side of the stem will need to be tightened down for the stem to sit all the way down on the steerer tube. At this point, the new wire cover can also be installed over the wires using the M4x10mm countersunk bolt.
Install the adjustable stem
Install the new wire cover
Step 5: Install the handlebars
The handlebars and headlight can now be installed back onto the bike in the same way it was during initial assembly of the bike. The original stem faceplate from the rigid stem can be used with this adjustable version or the new faceplate can be used although the headlight will need to be transferred over. If you own a torque wrench, tighten the stem faceplate bolts to 5nm.
Install the handlebars
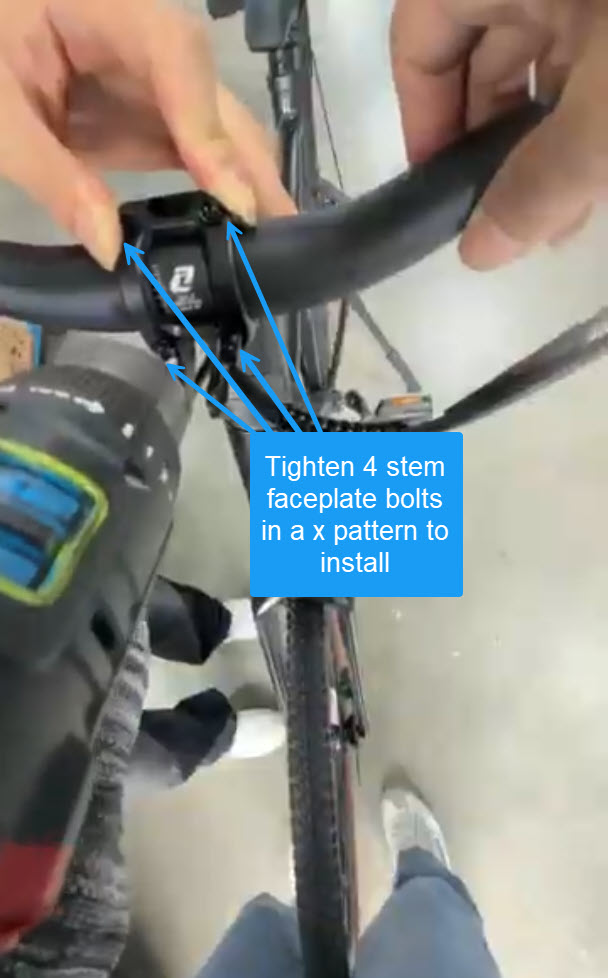
Step 6: Final adjustments
With the new stem installed you will need to go back over the bolts to ensure everything is secure and adjusted to your desired riding position. These final checks should be done in the following order:
- The top cap bolt needs to be tight enough to remove any play between the fork and frame. You can double check this by holding the front brake down and rocking the bike forward and backward while using your other hand to feel for play where the fork meets the frame above the wheel.
- The handlebars can be aligned with the wheel and pinch bolts tightened to lock them in place.
- The "Angle Adjust" bolt on the right side of the stem can be loosened to raise or lower the handlebar position. Before riding, tighten this bolt back down to lock the position in place.
This adjustable stem is a great option to adjust the riding position of the bike. If you run into any issues along the way, feel free to reach out to our knowledgeable customer support agents with photos of where you are in the process for assistance.


