

Materials Needed
13mm open-end wrench
Screwdriver
M8 Bolts & Washers
M5 Bolts
Foot-peg
Passenger Seat
Passenger Fit Requirement
Passengers must be tall enough to comfortably reach and keep both feet securely supported on the footpegs while seated fully on the passenger seat. Do not carry a passenger whose feet cannot reach both pegs. Check fit before riding, and keep feet on the pegs throughout the ride.
For smaller passengers who cannot reach the footpegs, consider a front-mounted child seat specifically approved by the seat manufacturer for your bicycle model and the child’s age, weight, and height. Confirm compatibility before purchasing or installing.
Step-by-Step Instructions for Vorsa
Step 1: Install Foot Pegs
Slide a large washer onto the M8x35mm bolt.
Insert the bolt from the inside of the rear chainstay.
Carefully thread it into the foot peg, ensuring it only folds upward (not down or sideways).
Securely tighten with a 13mm wrench.
Repeat for the other side.
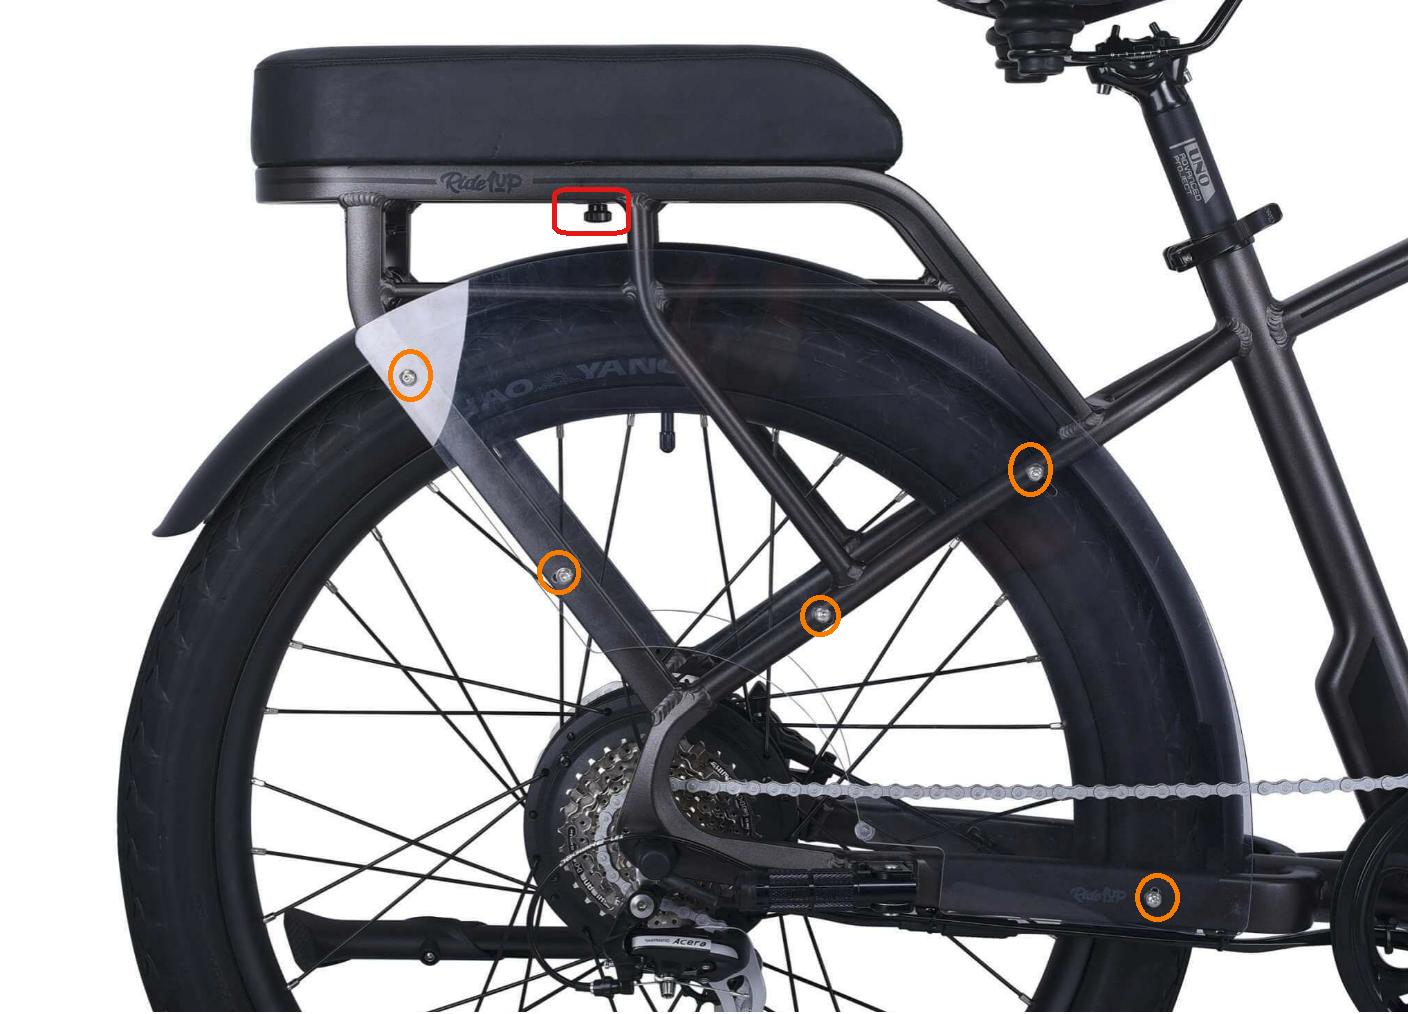
Step 3: Install the Connect+ Seat
Place the seat on the rack with the slanted end facing forward.
Align the latch mechanism in the square section of the rack.
Pull the latch pin backward to retract the latch.
Press the seat down until the pin slides back forward and locks.
Do not force the latch.
Double-check that the seat is secure before riding.
Step-by-Step Instructions for Portola
Most steps are the same as for Cafe Cruiser & Rift, with a few changes:
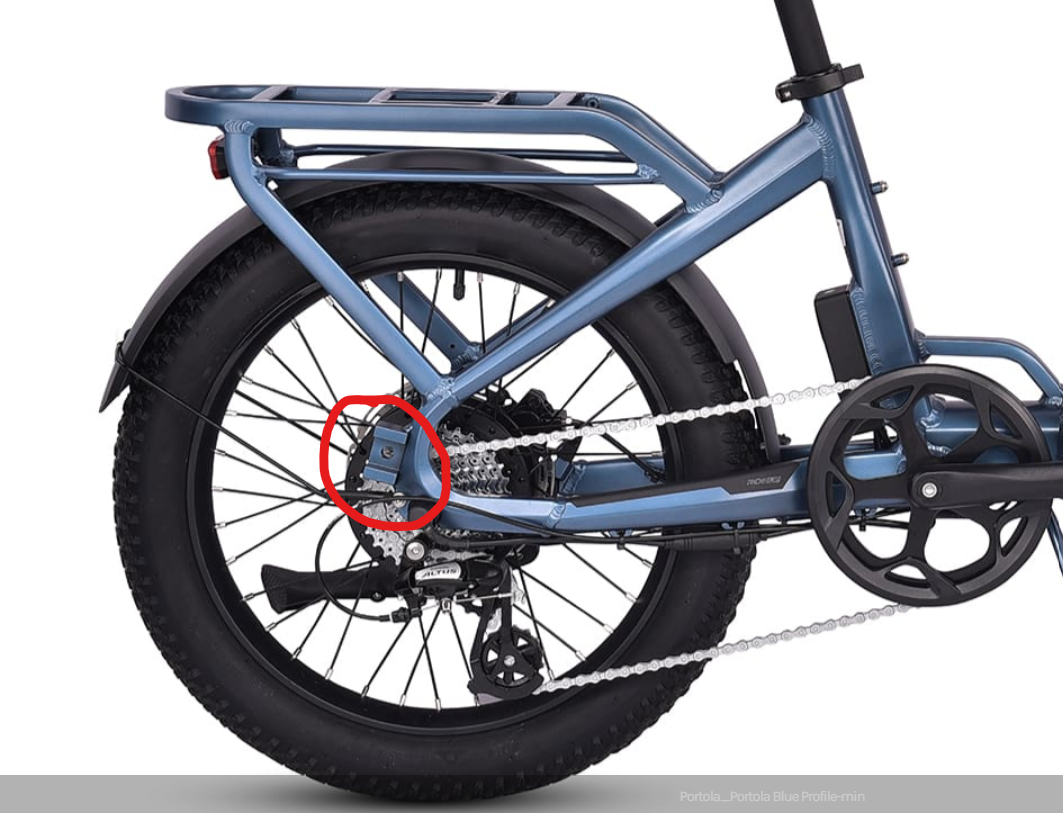
Step 1: Attach the Foot Pegs
Use M8x20mm bolts instead of M8x35mm.
Slide a washer onto each bolt.
Insert the bolt from inside the rear braze-on (behind the axle).
Thread it into the foot peg, ensuring it only folds upward.
Tighten securely with a 13mm wrench.
Step 2: Install Connect+ Seat
Place the seat on the rack with the slanted end facing forward.
Align the latch mechanism in the square section of the rack.
Pull the latch pin backward to retract the latch.
Press the seat down until the pin slides back forward and locks.
Do not force the latch.
Double-check that the seat is secure before riding.
Note: Wheel covers are not needed for Portola.
Final Steps & Review
Ensure all bolts are tightened securely.
Check hardware as part of regular bike maintenance.
For any questions or additional assistance, please contact customer support.


